[React] Zustand & Redux Toolkit사용후기
- React의 상태관리 도구인 Redux Toolkit을 써보면서 느낀점 및 Zustand 사용경험을 비교 및 정리하였습니다.
0. Redux Toolkit과 Zustand의 간략 소개

Redux Toolkit
- 공식 문서 링크 : https://redux-toolkit.js.org/
- Redux를 보다 쉽게 사용하게 만들어주는 Toolkit입니다. 사용을 강제하지 않으며 필요에 따라 사용할 수 있습니다.
- Redux Toolkit은 불변성을 강조하며, 액션(action)과 리듀서(reducer)를 사용하여 상태를 관리합니다.
- Redux DevTools와 통합이 잘 되어 디버깅을 쉽게 할 수 있습니다.
- 대규모 애플리케이션에서 상태 관리를 효과적으로 처리할 수 있으며, 미들웨어를 사용하여 비동기 작업을 처리할 수 있습니다.
- useSelector를 통해 컴포넌트에서 상태값을 참조합니다.
Zustand
- 공식 문서 링크 : https://github.com/pmndrs/zustand/ https://docs.pmnd.rs/zustand/getting-started/introduction
- Zustand은 더 간단한 상태 관리 라이브러리로, React의 내장 훅(useState)과 유사한 API를 제공합니다.
- 작은 규모의 애플리케이션 또는 간단한 컴포넌트에서 상태 관리에 유용합니다.
- Redux에 비해 더 가벼우며, 설정이 쉽고 빠르게 시작할 수 있습니다.
- store를 컴포넌트에서 subscribe 하여 상태값을 참조합니다.
- 비교적 가벼운 패키지 크기를 가지고 있습니다.
1. 러닝 커브 관점
Redux Toolkit
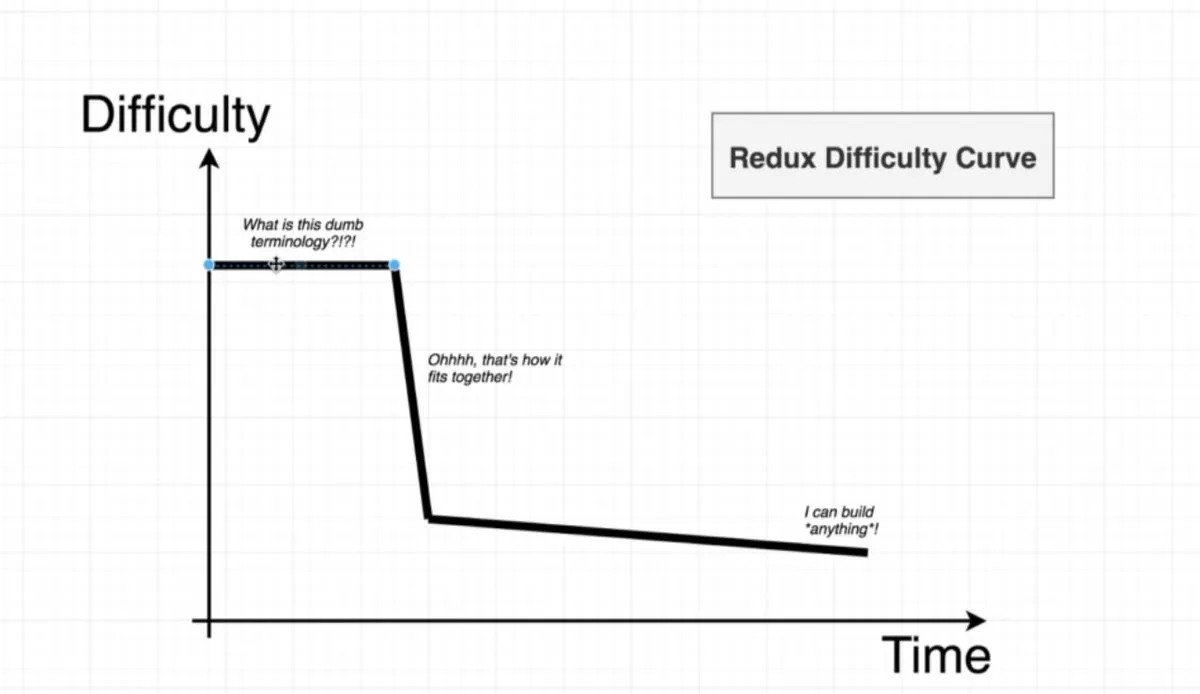
meme 이긴 하지만, 이런 그림이 돌아다닐 정도로 Zustand에 비하면 분명히 러닝 커브가 존재합니다. 특히 상태관리 도구를 처음 써본다면 더 어려운 느낌입니다.
Redux toolkit을 사용하려면 Redux toolkit에서 제공하는 api를 어느정도 알아야하고, redux가 추구하는 상태관리 방식도 이해가 필요합니다. 처음 접하는 개발자라면 Reducer, Action, Slice, AsyncThunk 개념이 잘 와닿지 않을꺼라고 생각되네요. 물론 이미 상태관리에 익숙하고 react사용에도 익숙하다면 큰 어려움은 아닙니다.
Zustand
공식 문서를 다 합쳐도 https://github.com/pmndrs/zustand 이게 다일정도로 Redux Toolkit에 비하면 간단한 러닝 커브를 가지고 있습니다. Redux Toolkit의 store기본 설정 방법과 zustand의 설정 방법을 본다면 더 확실하게 드러납니다.
store를 처음 생성하는 코드를 비교하면 좀 더 확연하게 드러나는데요.
Redux toolkit의 store & slice 정의
//slice정의
import { createSlice } from "@reduxjs/toolkit";

const initialState = {
  value: 0,
};

export const counterSlice = createSlice({
  name: "counter",
  initialState,
  reducers: {
    incrementByAmount: (state, action) => {
      state.value += action.payload;
    },
  },
});

export const { increment, decrement, incrementByAmount } = counterSlice.actions;

export default counterSlice.reducer;
//store 정의
import { configureStore } from "@reduxjs/toolkit";
import counterReducer from "../features/counter/counterSlice";

export const store = configureStore({
  reducer: {
    counter: counterReducer,
  },
});
- 상태관리의 최소 단위인 slice를 생성하고 store에 이를 등록하는 과정을 거치고 있습니다.
Zustand의 store 정의
import { create } from "zustand";

const useBearStore = create((set) => ({
  bears: 0,
  increasePopulation: () => set((state) => ({ bears: state.bears + 1 })),
  removeAllBears: () => set({ bears: 0 }),
}));
- store안에 상태와 액션을 정의하고 있습니다.
코드 라인 수가 난이도를 결정하는건 아니지만, 어느정도 차이가 있는것은 분명합니다.
2. 가이드 라인 관점
Redux Toolkit
redux toolkit은 공식 문서에서 각 API를 어떻게 쓰면 좋을지부터, 디렉터리 구조, 데이터 fetching 관련 가이드 라인을 제공하고있습니다.
- 사용자 가이드 : https://redux-toolkit.js.org/usage/usage-guide
- 파일 스트럭쳐 가이드 : https://redux.js.org/tutorials/essentials/part-2-app-structure

파일 구조의 가이드라인을 제시해서 어플리케이션 내의 구조를 일관성 있게 유지하려는 부분으로 보입니다. 프로젝트 규모가 커질 수록 일관성 있는 구조가 중요한데, Redux Toolkit이 이 부분을 잘 잡아주고 있습니다.
Zustand
일정 수준의 가이드 라인이 존재하는 Redux Toolkit과는 다르게 공식 문서에는 파일이나 디렉터리 가이드라인이 존재하지 않습니다. Zustand가 추구하는 작고 가벼운 방향에 맞게 개발자가 임의로 파일명, 디렉터리 구조를 작성하게 되어있습니다. 혹시나 구글링을 해봐도 프로젝트 상황에 맞게 쓰는걸 권장하고 있습니다.
3. 데이터 Fetching 관점
Redux Toolkit
- 이미 잘 알려진 Redux Toolkit Query(RTK Query)를 사용하여 서버에서 데이터를 가지고 오고, 상태관리와 직접 연결하여 사용할 수 있습니다.
Zustand
- 따로 데이터 Fetching을 위한 도구를 내장하고 있지 않기 때문에, 개발자가 원하는 아무 fetching 툴을 사용해도 됩니다. 심지어 React-Query와 연결해서 사용할 수도 있습니다.
4. 불변성
Redux Toolkit
Redux Toolkit은 자체적으로 immer를 사용하고 있어 상태 변경시 불변성을 보장하고 있습니다. (링크 : https://redux-toolkit.js.org/usage/immer-reducers) 따라서 상태를 업데이트할 때 불변성 유지를 위한 코드를 따로 작성하지 않아도 내부에서 알아서 처리해줍니다.
Zustand
Redux Toolkit이 내부적으로 immer을 사용하고 있는것과 달리 zustand는 immer를 별도의 미들웨어 형태로 추가하여 사용할 수 있습니다. 물론 상태를 업데이트할 때는 불변성을 유지한 상태로 업데이트 하는것을 권고하고 있습니다.
import { create } from "zustand";

const useBearStore = create((set) => ({
  bears: 0,
  //상태를 set함수로 병합하여 불변성을 가진 상태로 업데이트
  increasePopulation: () => set((state) => ({ bears: state.bears + 1 })),
  removeAllBears: () => set({ bears: 0 }),
}));
immer 사용
import { produce } from "immer";

const useLushStore = create((set) => ({
  lush: { forest: { contains: { a: "bear" } } },
  clearForest: () =>
    set(
      produce((state) => {
        state.lush.forest.contains = null;
      })
    ),
}));

const clearForest = useLushStore((state) => state.clearForest);
clearForest();
5. 디버깅
Redux Toolkit
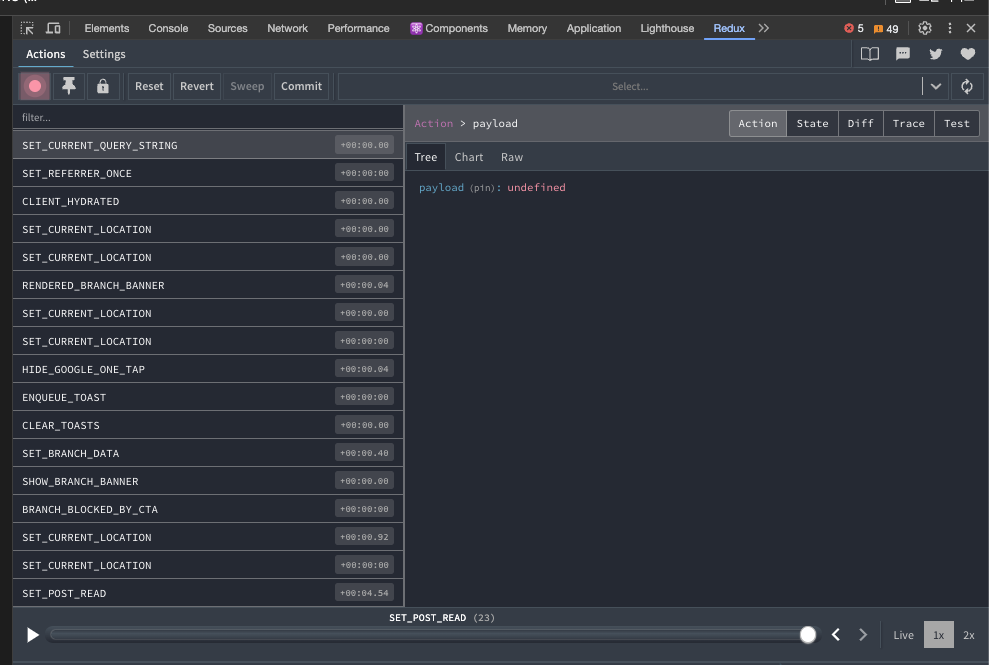
크롬 확장 도구인 react-developer-tool을 설치하여 쉽게 디버깅을 지원하고 있습니다.
https://chrome.google.com/webstore/detail/react-developer-tools/fmkadmapgofadopljbjfkapdkoienihi
Zustand
Redux Toolkit과 마찬가지로 reactr-developer-tool을 설치하면 디버깅을 보다 쉽게 할 수 있으나 store에 middleware를 별도로 추가해야합니다. 그렇지 않으면 개발자 도구에서 추적이 불가능합니다.
import { devtools } from "zustand/middleware";

// Usage with a plain action store, it will log actions as "setState"
const usePlainStore = create(devtools(store));
// Usage with a redux store, it will log full action types
const useReduxStore = create(devtools(redux(reducer, initialState)));
6. Zustand 사용 팁
Zustand 사용하면서 얻었던 팁을 정리해봅니다.
전체 스토어를 구독하지 않기
공식 문서에는 subscribe 메서드로 store의 모든 변경사항을 추적할 수 있습니다. store내부에 정의된 상태가 변경 될 때 마다 subscribe에 등록한 콜백이 호출되는 형식입니다.
const useDogStore = create(() => ({ paw: true, snout: true, fur: true }))

// Getting non-reactive fresh state
const paw = useDogStore.getState().paw
// Listening to all changes, fires synchronously on every change
const unsub1 = useDogStore.subscribe(console.log)
// Updating state, will trigger listeners
useDogStore.setState({ paw: false })
// Unsubscribe listeners
unsub1()

// You can of course use the hook as you always would
const Component = () => {
  const paw = useDogStore((state) => state.paw)
  ...
그러나 해당 방식은 store 전체의 변경사항을 추적하므로 불필요한 콜백 함수 호출을 일으킬 가능성이 매우 높습니다. 따라서 selector를 활용하여 특정 상태값만 구독하는게 바람직합니다.
//store에서 특정 상태 변경만 구독
const nuts = useBearStore((state) => state.nuts);
const honey = useBearStore((state) => state.honey);
//subscribe 메서드의 selector 옵션 사용
subscribe(selector, callback, options?: { equalityFn, fireImmediately }): Unsubscribe
//subscribe에서 selector 옵션을 사용하려면 해당 store의 middleware에 subscribeWithSelector를 반드시 추가해야합니다.
import { subscribeWithSelector } from "zustand/middleware";
const useDogStore = create(
  subscribeWithSelector(() => ({ paw: true, snout: true, fur: true }))
);

// Listening to selected changes, in this case when "paw" changes
const unsub2 = useDogStore.subscribe((state) => state.paw, console.log);
// Subscribe also exposes the previous value
const unsub3 = useDogStore.subscribe(
  (state) => state.paw,
  (paw, previousPaw) => console.log(paw, previousPaw)
);
한번 subscribe로 구독하였다면 반드시 구독해제하기
const ExampleComponent = () => {
  useEffect(() => {
    const unsub2 = useDogStore.subscribe((state) => state.paw, console.log);

    return () => {
      //중요!!
      unsub2();
    };
  }, []);

  return <div>..</div>;
};
특정 컴포넌트에서 subscribe 하였다면 해당 메서드의 반환값으로 주어지는 구독해제 메서드를 반드시 컴포넌트가 unmount될때 함께 호출하여 구독을 해주어야합니다.
만약 해제하지 않는다면 subscribe콜백이 계속 호출되어 메모리 누수의 원인이 될 수 있습니다.
이 외외에 zustand 사용 팁을 자세히 설명해주신 블로그가 있어 첨부합니다.
https://itchallenger.tistory.com/814
7. 정리
Redux Toolkit과 Zustand를 사용해보면서 느낀점을 간단하게 비교해보았습니다. Redux Toolkit이 대규모 어플리케이션에 적합하며 Zustand가 소규모 어플리케이션에 적합하다고 하지만, 사용하기에 다르다고 볼 수 있습니다. 애초에 둘 다 상태관리를 위한 도구이고 방향은 달라도 목적은 동일하다고 생각합니다.
Leave a comment